
I won't ramble on today, as there are LOTS of pics to bore you with. Firstly I'll show you what I created with the kit, and then if you'd like to see how I made it, please check out the tutorial below.
Here's my finished card ...

1) I trimmed 2 sheets of my chosen Nordic Christmas papers in half, and popped some tape on the back to keep them together. The papers in the pack complement each other, so they match well. Personally I prefer the lighter colour on top as it seems to balance out the finished card better, but try out some papers and decide which you think looks good.

2) Put the papers face down on a cutting mat, and lay your card base on top (don't stick it down at this point). Line up the top and one side of your card base against the papers and using a ruler either trim the excess paper away from the other side with a craft knife (if you have one), or mark with a pencil and trim with scissors. Only trim the side edge at this stage, not the bottom edge.

3) Remove the base card and place it to one side. Turn over your papers and lay a strip of the ribbon across the join to hide it up.
Tip : If you can still see the join through the ribbon, which is possible if one paper is much darker than the other and the ribbon is semi-transparent, then place the bottom edge of the ribbon almost directly over the join. The lighter paper should not show through much, but more importantly the contrast of the join will not be noticeable either. :0)

4) Turn over the papers and fold the ribbon around the edges, sticking it to the back of the card using sticky tape. This is why you needed to trim the width of the card in step (2) above because now the ribbon is wrapped around you won't be able to trim it once it's stuck on the card.

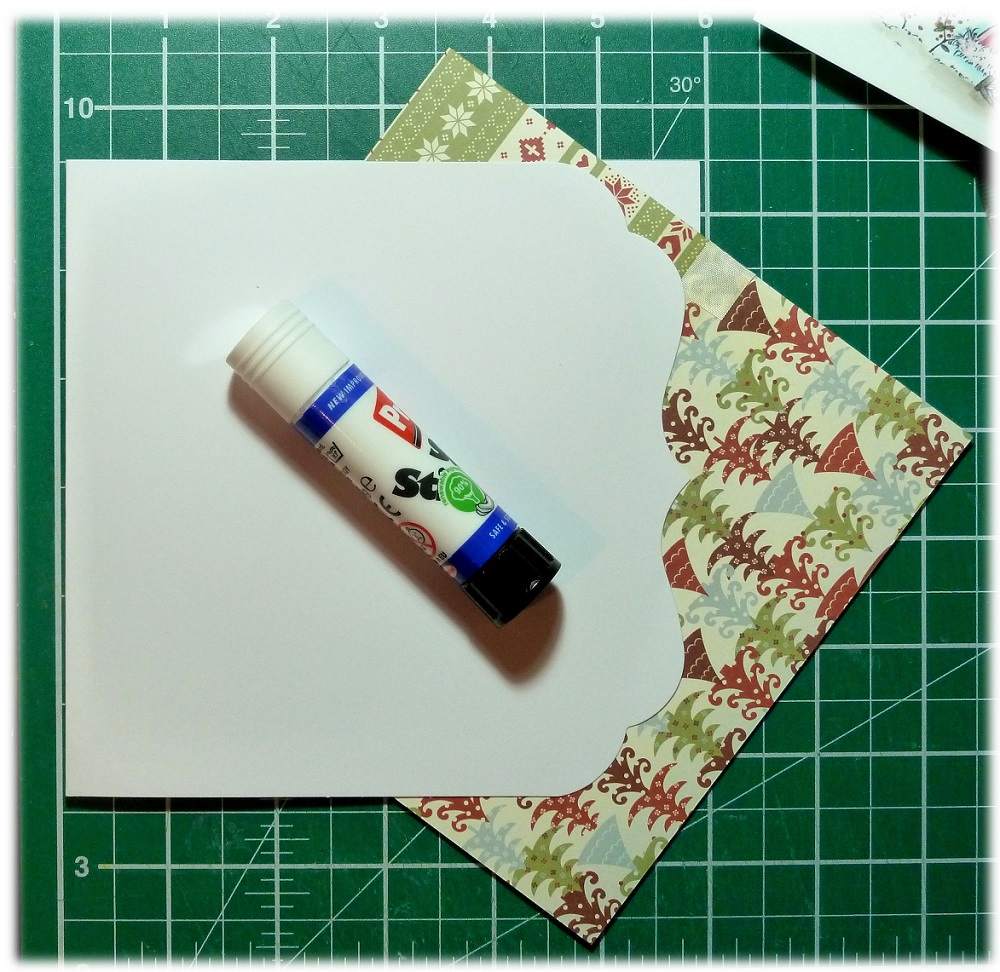
5) Now stick your papers to your base card. I use a dry glue stick as wet glue can make the papers ripple. Alternatively you can use double sided tape, but this can be tricky around a shaped card.
Tip : When using my glue stick, I pop the papers (reverse side up) inside the card base so they're directly underneath as much of the fancy card edge as possible. You need to ensure that you get the glue right to the edge of the card base and overspill can make your cutting mat / desk sticky. But it doesn't matter if you get glue on the reverse of the papers, because it all helps to stick it down anyway!
6) Once the papers are stuck on, lining up the sides and top carefully, turn the card over, and open it up. You should see the excess papers on the reverse. With scissors, or a sharp craft knife, use the edge of the shaped card as a guide and carefully trim off the excess papers.

7) This is what your card should now look like - all neat and trimmed with a pretty ribbon hiding the join in the papers.

8) Tie a strip of ribbon into a bow, and push a pearl brad through the middle. I sometimes have to wiggle it back and forth to work it through all the layers of ribbon in the bow, and it also helps if you've not pulled the bow into a vice-like knot, but more a gentle (but not loose) knot. This can take a bit of practice, and sometimes I use my craft knife to get it started. The next pic shows the brad pushed through, ready to be used.

9) You're now ready to assemble your card. I've coloured my image in colours to complement my papers, and matted both my image and another rectangle of designer paper onto pink card, trimming the edges neatly. At this stage I like to lay my elements out to check where I'm going to place them. I am planning to use the paper panel as the base for my bow, so I mark where the brad will need to push through, and make a teeny slit with my craft knife. If you don't do this, and try to push the brad through without any cut, then it can crease the designer paper as it pushes though.

10) I've now pushed through the brad and opened it up on the reverse of the paper panel. This is a super strong way to adhere your bows.

11) Use strong glue or foam pads to stick your paper panel / bow combo onto your card base.

12) Use more glue or foam pads stick your image panel onto the card base.
Tip if you're using Foam Pads : If the next layer is overlapping part of a previous layer, part will already be raised up if you're using foam pads. Therefore work out which part will be 'double height' and pop two foam pads on that section to support it at the right height. Hopefully here you can see that the right hand side, where the lower paper panel won't be lifting up the image panel, I've used 2 foam pads instead of one.

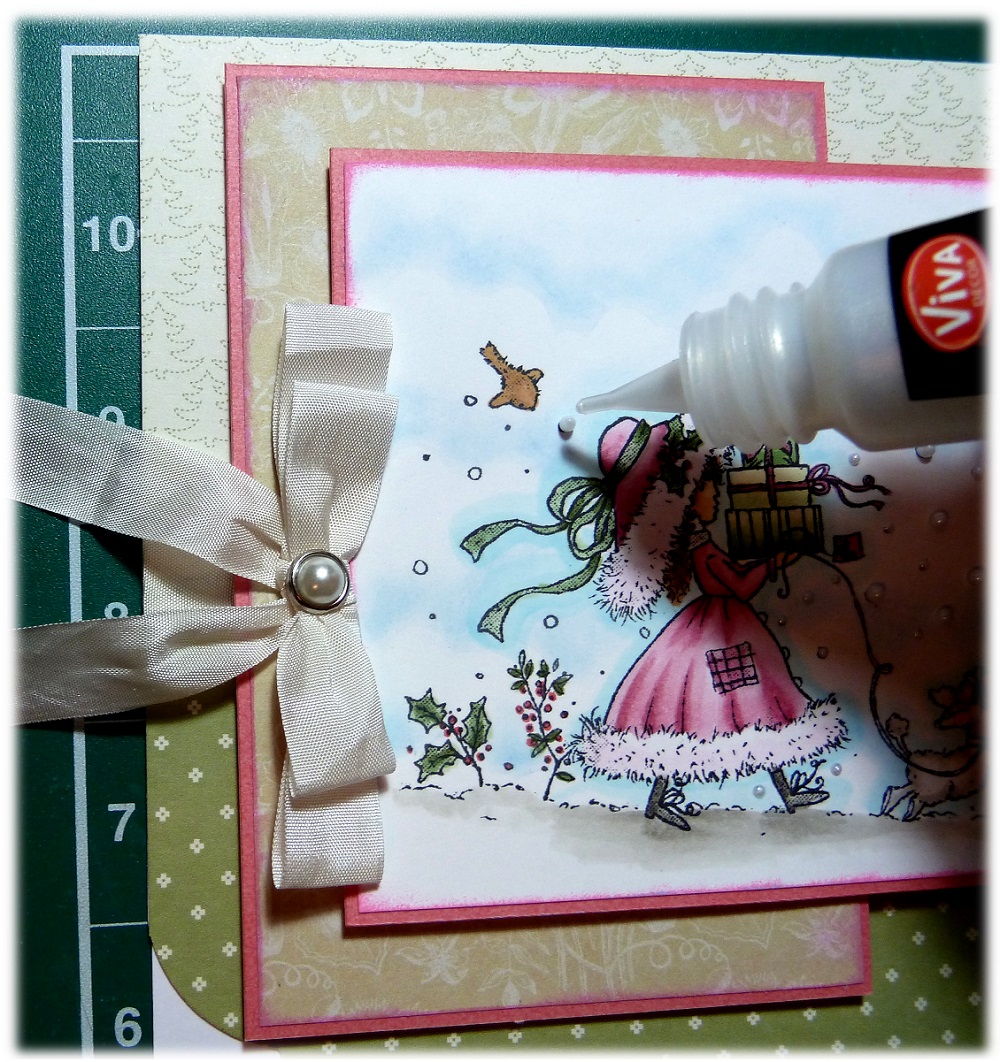
13) I've then added some Viva Pearl Pen to the snow.
14) Finally I've added some Glossy Accents onto the ground ...

... and some Crystal Glamour Dust (fine white glitter) over the glossy accents. I keep my glamour dust in a recycled business card box, and use a teaspoon to sprinkle it where I want it, and tap the rest back into the box afterwards. The next photo is at the mid-glitter stage, before I've knocked off the excess.

And voilà!!!

Card Recipe:
Annabelle with Gifts Craft Kit (or buy separate components linked below)
I've only used a small portion of the kit as follows:
- Wild Rose Studio stamp Annabelle with Gifts
- First Edition Nordic Christmas Papers
- Cardworks Shaped Card base
- Self Adhesive Pearls
- Eggshell Vintage Style Ribbon
- Hobby House 8mm Pearl Brad
Other items used:
- Copics
- Neenah Classic Crest White Stamping Card
- Momento Stamp Pad Ink
- Crystal Glamour Dust
- Glossy Accents
- Viva Decor Pearl Pen
Annette
xx
Gorgeous as always.
ReplyDeleteFab tutorial too :o)
Debs xx