Monday, 3 December 2012

"Mountain Lily"

Hello everyone...
At last..., I'm back and today I have a new card to show you which I've made for 

 The Stamp Basket..
 For my card today, I used this gorgeous stamp from Whimsy Stamps "Mountain Lily" designed by Sylvia Zet © Wee Stamps. As always, I colored my image with copic markers.

Here is my card:

 ***************
 *************
Recipe:
Stamp: Whimsy Stamps "Mountain Lily"
Blank Card: Craftwork Cards Straight Edge Card Pack
Ink: Memento Tuxedo Black
Papers: Prima "Fairy Belle"
Dies: Memory Box - "Riviera Corner"
Embellishments: Vintage style cream ribbon, May Arts Burlap twine – natural, Stickles Glitter Glue - Star Dust, The Hobby House 3mm Pearls - Snow White, Tim Holtz Distress Ink Pad - Walnut Stain
 
Thanks for stopping by...

 Hugs Natalie xx

My Creativity LIFE!

Saturday, 1 December 2012

Christmas Teddies

Hi everyone. It's Annette here today with a card using a sweet image from The Stamp Basket called Christmas Teddies.  This is the second time I've used this image, and instead of colouring them like polar bears as I did last time, I've coloured them in pale browns and creams.  I think they look cute with their dark paw pads.  I've coloured their scarves to match the backing papers which are Noah's Ark.  The papers are not especially Christmassy, but the daisies on them really seemed to match the snowflakes on the Memory Box Snowflake Corner die so I think they're fine.

I've done some stitching around the backing panel and image but you can only really see it clearly on the image panel.

It is there.

Honest!


All items are from The Stamp Basket as follows:

Pop over to The Stamp Basket to see the lovely array of products on offer. Don't forget there's still the Special Offers on this weekend, so grab a bargain while they're on offer.  Go on, treat yourself for Christmas !!!


Have a great weekend.
Happy crafting.
Annette
xx

Friday, 30 November 2012

Non-Christmas Letters....


Hi,

I have a simple non-Christmas card to show you today using the gorgeous Bildmalarna ‘Christmas Letters’ stamp…which is one of the stamps on special offer in our store this weekend! I just love these stamps and although Christmas appears in the title of the stamp, I think it’s one of those Bildmalarna stamps that can be multi-purpose!


Here’s a close up of the image, coloured with copics


I’ve used the gorgeous Prima ‘Almanac’ papers matted onto Bazzill Kraft.

Recipe
All products listed available in our on-line store

Stamps: Bildmalarna ‘Christmas Letters’
Papers: Prima ‘Almanac’
Card: Craftwork Cards Straight Edge Card Pack; Bazzill Kraft and Carob
Ink: Memento Tuxedo Black
Embellishments: Vintage style walnut ribbon; May Arts 38mm ivory crotchet lace; May Arts Burlap twine – natural;  Deco Art crystal glamour dust; Prima wooden button; 3mm ivory pearls
Tools: Memory Box Poppy Stamps ‘Simple Banner’ die; Whimsy Corner Die Set  

Hoping you have a lovely weekend…and if you get time, don’t forget to drop buy our store and have a look at the special offers on Bildmalarna and Stampavie stamps!

Hugs,
Janet xx

Thursday, 29 November 2012

Baby Jesus

Hi Everyone

Remember the video tutorial I posted on Monday, well today I have a card to show you using the image I used in my video.

Here's my video, just in case you missed it!


Here's my card.


The stamp I've used is called Baby Jesus by Wild Rose Studios.  Here's a close-up of the finished image


Items used on this card are:

Craftwork Card Blank
Baby Jesus Stamp by Wild Rose Studio
Papers from Teresa Collins Christmas Cottage Pad
Snowflake Die from Spellbinders Snowflake Pendant Set cut in white card and coloured with Tim Holtz Distress Ink in Wild Honey
Holly Die - Nellie Snellen Holly Branch cut in Rain Forest Bazzill Cardstock and Parakeet Bazzill Cardstock
Rhinestone


Thanks for stopping by today.  Hope you like it.

Hugs
Penni
X

Wednesday, 28 November 2012

Christmas Birdie


Here we are with my fourth GDT card for the Stamp Basket and today I've chosen a cute Nellie Snellen image called 'Christmas Birdie'. I've linked all the items I've used so no excuse not to click and go! :)
Stamp - Nellie Snellen - Christmas Birdie
Papers - Kaisercraft - Twig and Berry
Die cut corners - Memory Box - Snowflake corner
Sentiment - Whimsy - Christmas sayings
Hobby House - 3mm pearls
Ribbon - Vintage style -cream
Button from stash
Burlap twine - natural
Go Kreate XXL Square Frames - Frilly #7
Art Institute crystal glitter
Shaped card - Elegant square
Polar white Flowersoft from stash

The image is coloured with Promarkers
Skin - ivory, blush, vanilla, oatmeal, baby pink
Hair - Burnt sienna, cocoa, caramel
Coat and hat - Burgundy, berry, poppy
Parcels, mittens and legwarmers - Gold, mustard, sandstone


A sideways view to show the layers

Thank you so much for joining me today. Have a good one!

Monday, 26 November 2012

Video Tutorial

Hi Everyone

In this week's Video Tutorial I show you how to colour pleats and folds with Copic Markers.

The stamp featured in this video is called Baby Jesus from Wild Rose Studio


If you pop back on Thursday, you can see the project I made using the image featured in my video.

Thanks for visiting today.

Hugs
Penni
X

Saturday, 24 November 2012

Bella with Sledge and Clouds Background Tutorial

Hi everyone, it's Annette here today to share a card using a sweet Wild Rose image from The Stamp Basket.   I've not used these Bella stamps before they're just adorable.

The image is quite large so I've not adorned this card with my usual die cuts and embellishments, just few flowers and a gorgeous aqua satin ribbon bow.

Aqua is my favourite Christmas colour this year.  I absolutely adore these Nitwits Joyful Hearts papers but it feels a real shame to cover them up !

The clouds in the background are done with my chalks using a cloud template that I've created myself (see below) and a similar technique to the fab background tutorial posted by my fellow Stamp Basket designer Penni last week (see Penni's tutorial here) where she shows you how to mask your image first too (which is the bit that I shortcut, cos I'm lazy!)


I've included my template below in case you want to download it.  Please do leave me a comment too to let me know how you get on using it too.

Click on the template to see it in its original size, save it down to your computer and then print it out on card or acetate.  Cut out the cloud shape and then use it as a mask.


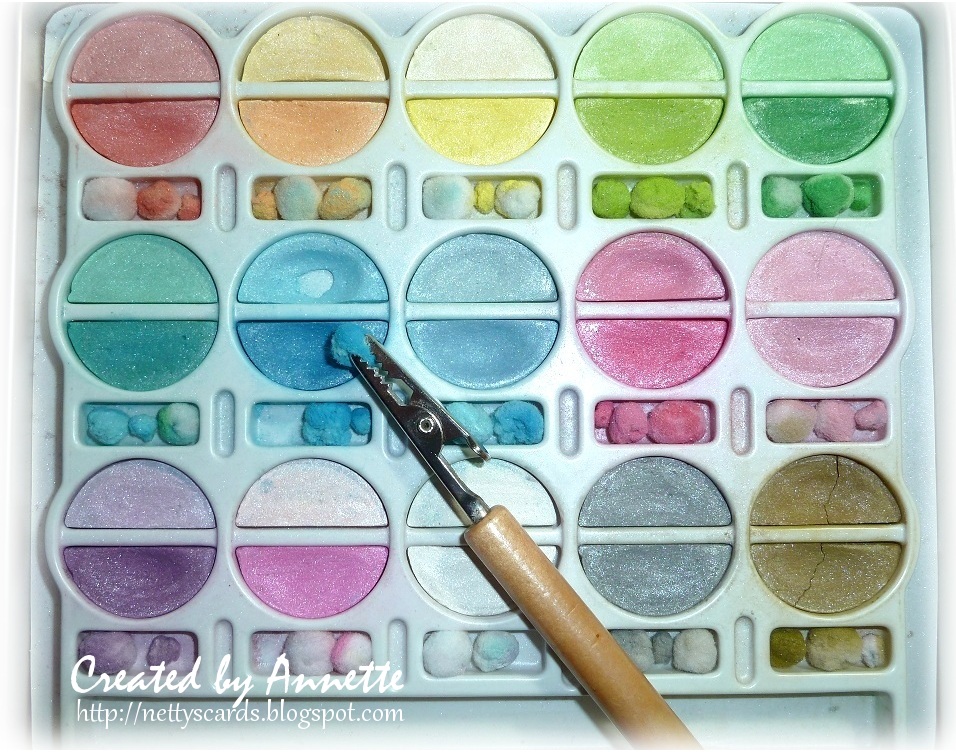
I use shimmer chalks to colour my clouds (yup, you can see the one I use the most for my clouds!) but you can use inks too.


Before I start applying my chalks, I outline my image with B000, a really pale blue which makes the image pop off the page a bit:


I then lay my cloud template over my image, starting at the top, and just cover the top of the image with my template:


I apply my first row of clouds across the full width of the image panel. I use the little pompoms and work in a circular motion to apply the shimmer chalk:


I apply about 3 to 4 rows working down each side of the image right down to the 'ground'.  To create a random effect with my clouds, I offset the template as I apply each row.


All items are from The Stamp Basket as follows:
Pop over to The Stamp Basket to see the lovely array of products on offer.


Happy crafting
Annette
xx